About Local Viking GeoGrid
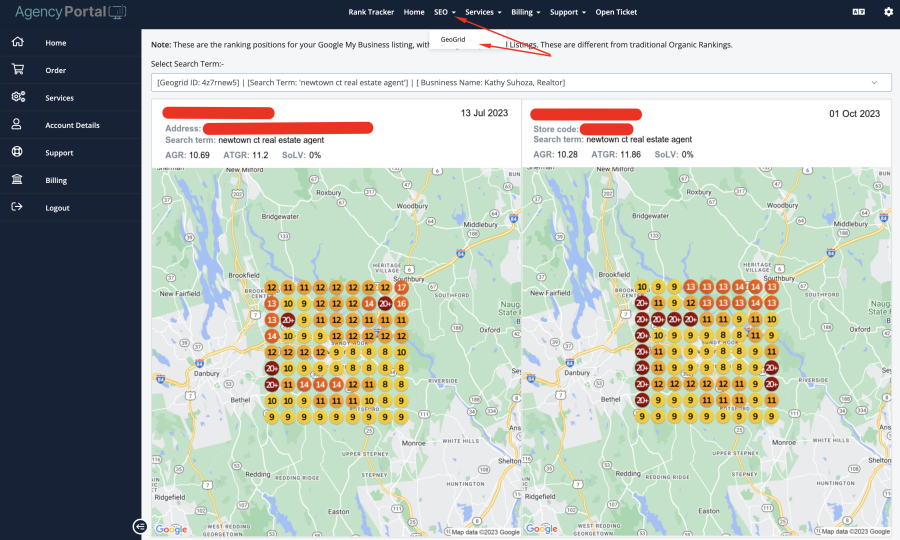
Modern SEO companies providing Google Maps optimization need GeoGrid visuals for client reporting. This module allows you embed live, automatically updated GeoGrids right in your client portal, alongside your other reporting assets. Local Viking, a black sheep but a leader in the GeoGrid space, provides an API that allows us to achieve this. Our module lets you embed before/after GeoGrids for your clients that are updated automatically. Local Falcon and Brightlocal do not currently offer an API that allows this. If your goal is to centralize everything in your client portal, Local Viking + AgencyPortal for WHMCS is the way to go. In our experience, LocalViking data is just as accurate and more cost effective than most alternatives.
Requirements
1. LocalViking API Key
2. License key provided with the addon purchase
How to upload the module files?
1. Download the zip file and extract it under whmcs_installation_dir/modules/addons.
2. Now login to the WHMCS Admin panel and navigate to Configuration > System Settings > Addon Modules or, prior to WHMCS 8.0, Setup > Addon Modules, and the addon will be listed.
3. Click on Activate, under the Local Viking GeoGrid Connector for WHMCS addon. The addon is now activated within your WHMCS Panel.
4. Now Enter your LocalViking API Key and License Key and tick on Administrator then click on Save Changes button. Now, this module is ready to use.

How to configure the module?
Addon Module
1. Login to the admin area.
2. Click on Addon > Local Viking GeoGrid Connector for WHMCS
3. Enter required details:
- Select the required product for the users who can access this module in their account.

- Select users if specifically need to hide this module for any user.

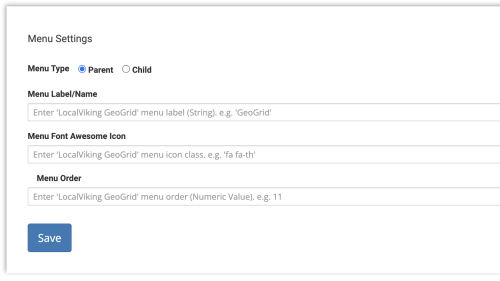
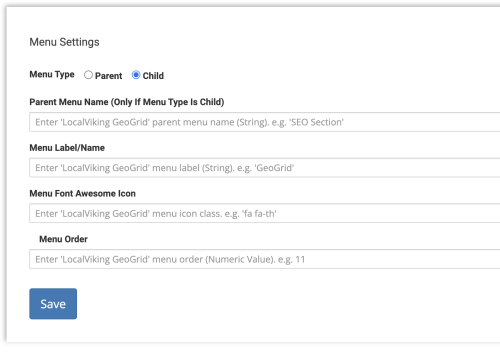
- Manage the menu in the user account.

This setting will add a parent menu to the user account. This setting works in conjunction with the Keyword, Work History, and Google Analytics addons settings. The menu can be added as a child menu under the parent menu (if created in the LocalViking addon setting).
The parent menu can be created either in the LocalViking addon or in the Keyword Rank Tracker addon. The below possible settings can be done:
- Add both settings as a parent menu.
- Add parent menu from either addon.
- Child menu from either (there must be one set as parent menu, and parent labels must be the same).

In case of adding as child menu, the parent menu must be created in the Keywords/Work History/Google Analytics addon settings. If parent menu label doesn't match, a parent menu will be created and then child menu will be added.
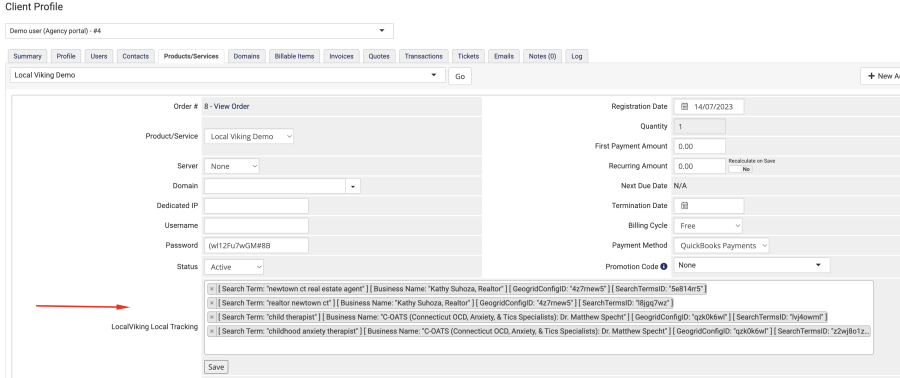
Configure User Account
Add the keywords from here and save to track and view in the frontend.


