- How to upload the module files?
a) Extract the wpengine downloaded zip.
b) Upload that file to the : WHMCS_DIR/modules/servers/
2. Configuring WP-Engine as WHMCS Product /Service
Log in to your WHMCS Admin Area.
Go to System Settings > Servers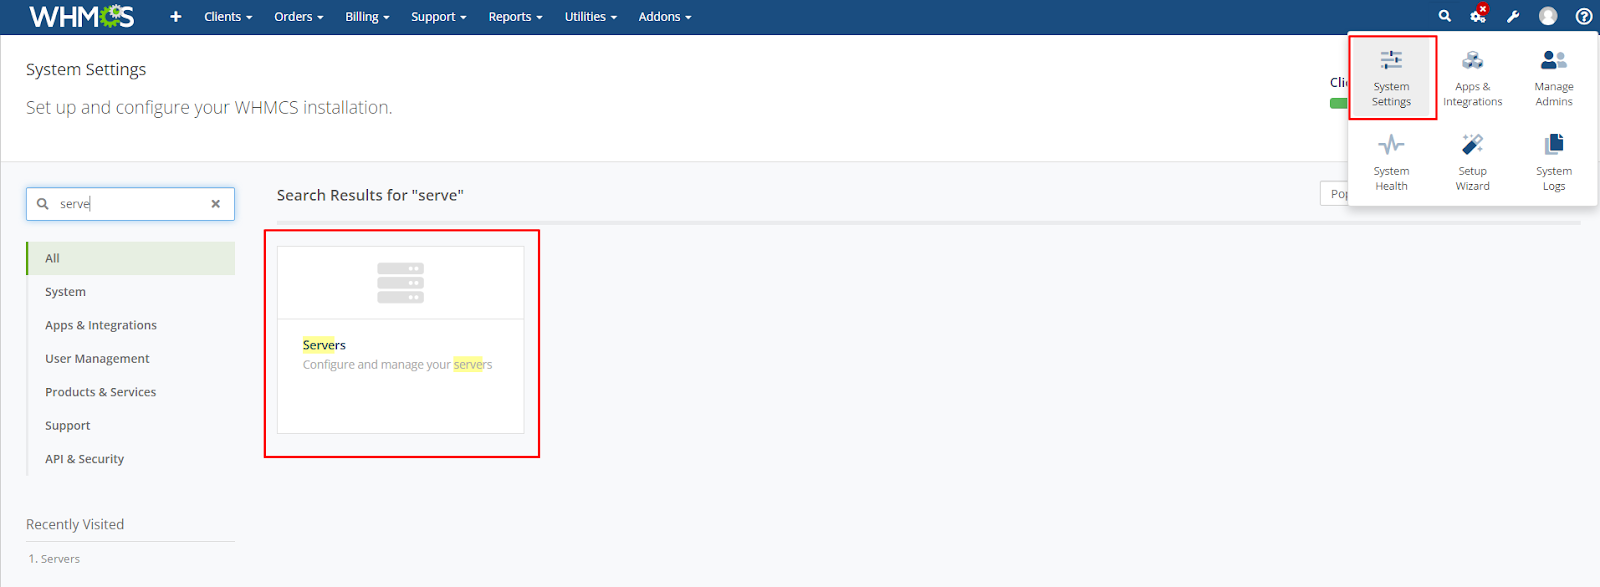
On the Servers page, rst, we need to create a group. Click on the 'Create New Group' option and add a group.
After that, click on 'New Server' and a form will appear. Fill out the form and click on the 'Save' button.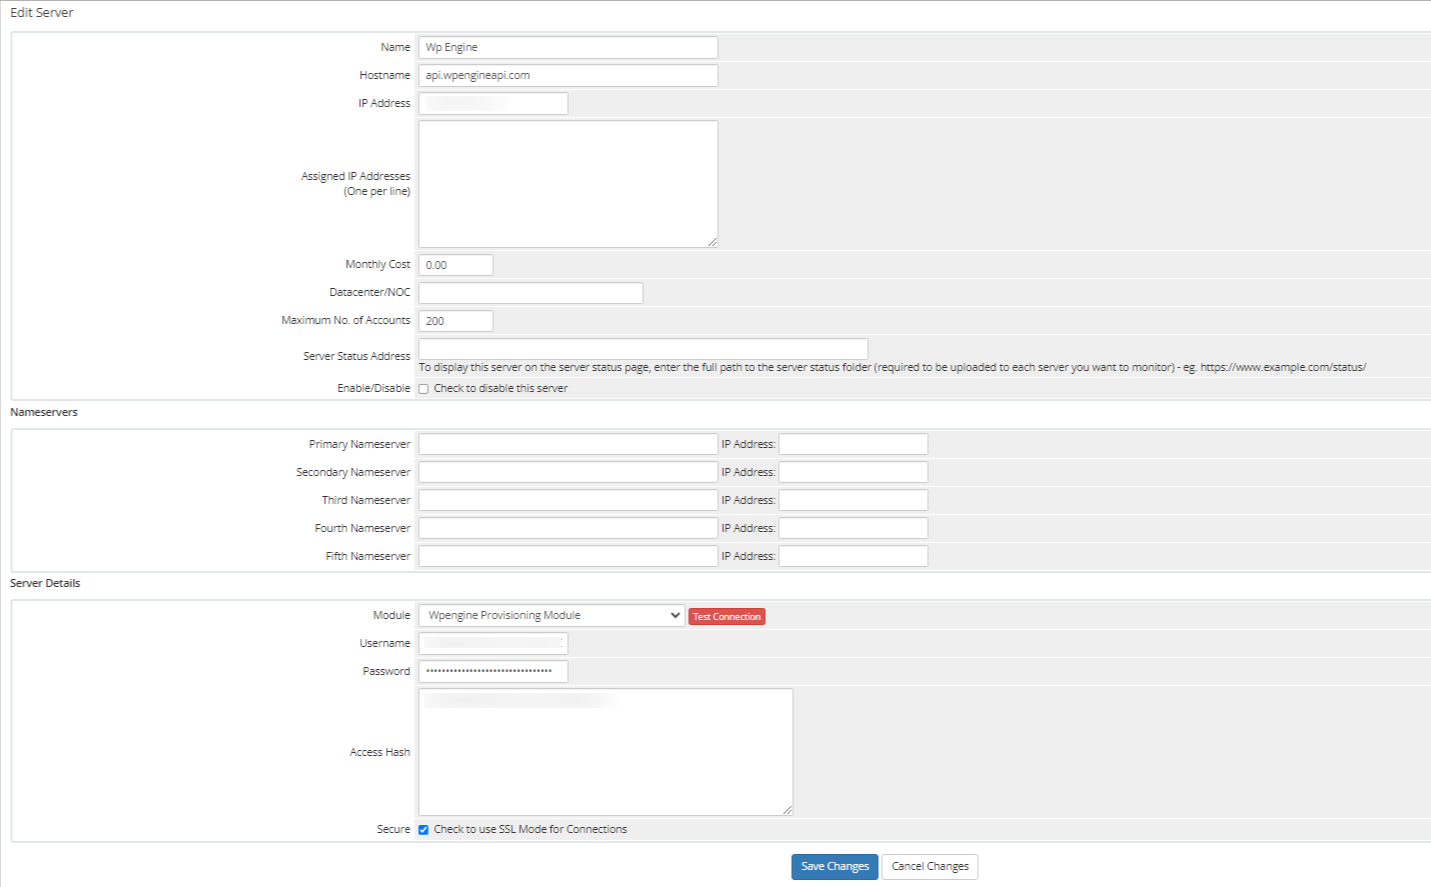
Name – the optional On App server name.
Hostname – the hostname of the server you're adding. If you connect to the server using secure connection, fill in this field using an https:// prefix
IP Address – the IP address of the OnApp server. Use https:// prefix if you're using SSL.
Enable/disable – tick the box to disable the server.
Specify server details:
Type – choose Onapp from the drop-down box.
Username – fill in the username which will be used to log in to your OnApp server to create virtual machines.
Password – the password for the specified username.
Secure – tick to use SSL for connections.
After that click on save changes
Setup Product:
After that go the System Settings > Products/Services and create a new product
In the module settings tab select module Name “Wpengine Provisioning Module” and server group “wp engine”
In the Choose Account dropdown select the owner account and in the Choose Roles option choose the specific role of the user
In the Additional No. of Sites text field we can select the number of sites limit in the client area
Admin and Client Side Features:
Admin Side:
On the admin side, we have features to create, suspend, unsuspend, terminate, and change the package of any particular user's service.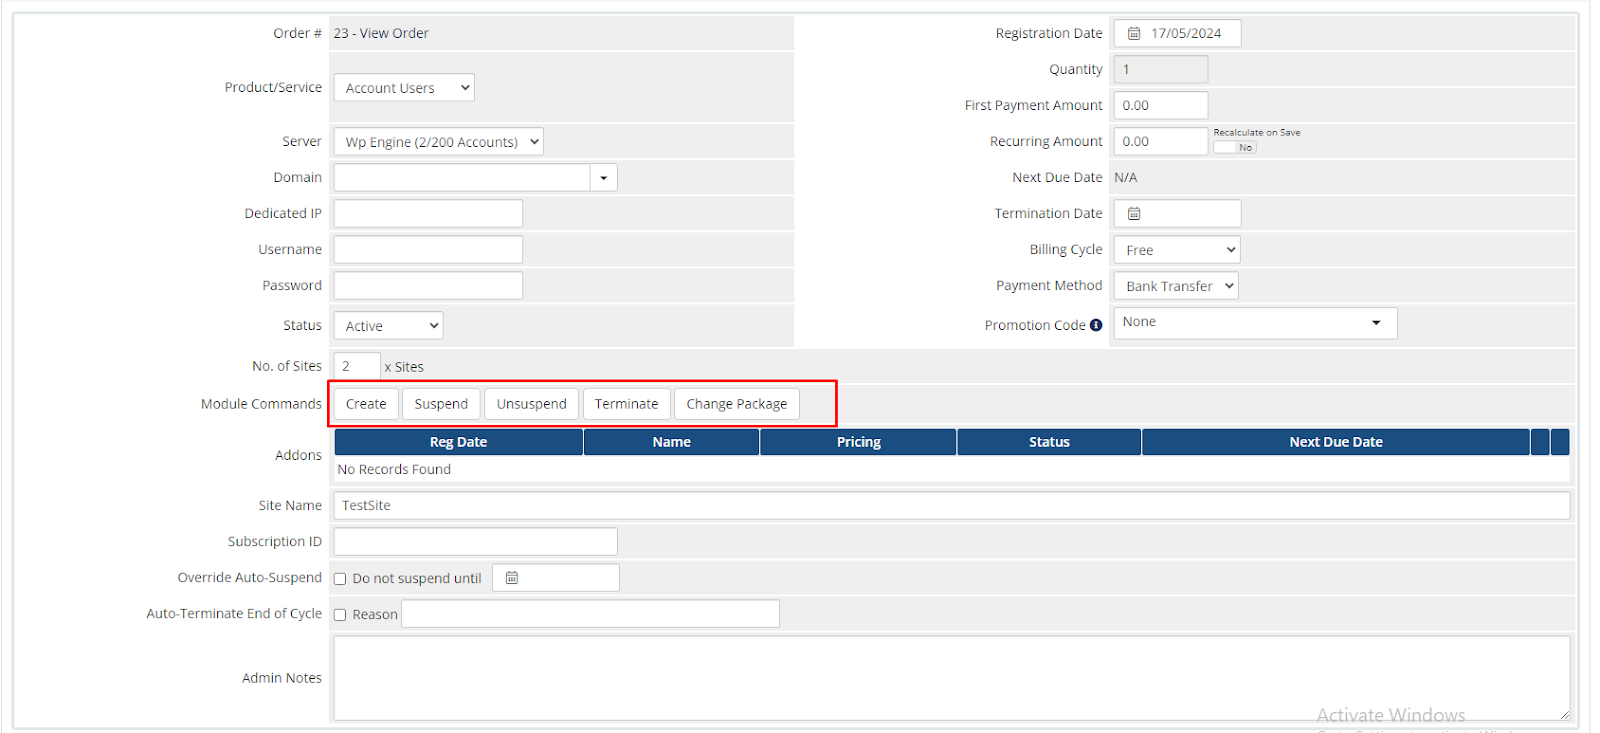
Client Area
Order a new service:
On the client Area Click on services > order new services , after that select on the WP Engine service and click on order now button.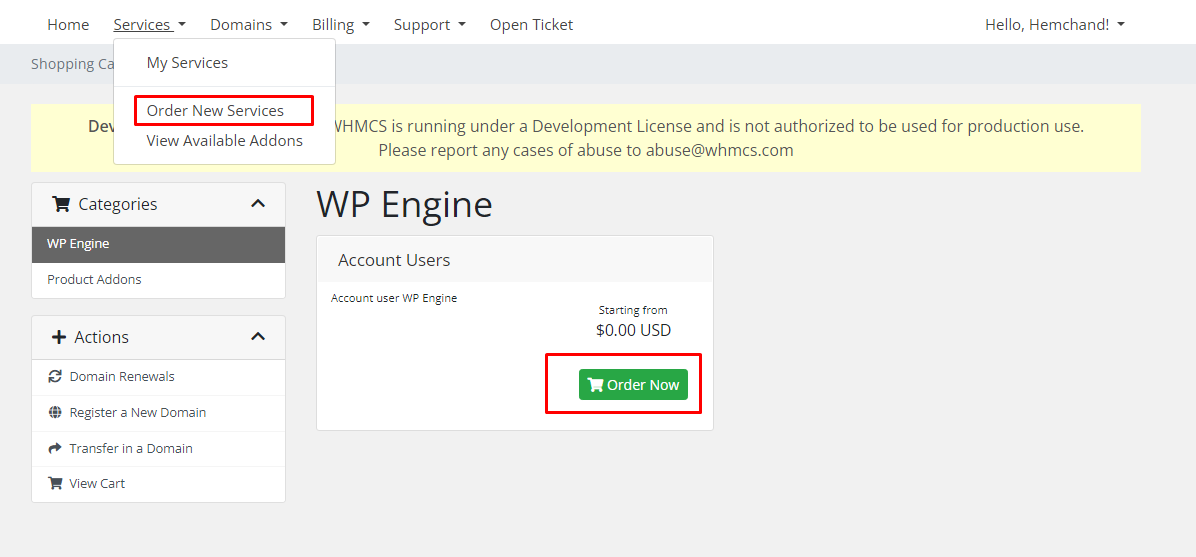
You can select the number of sites and the site name which you want to create.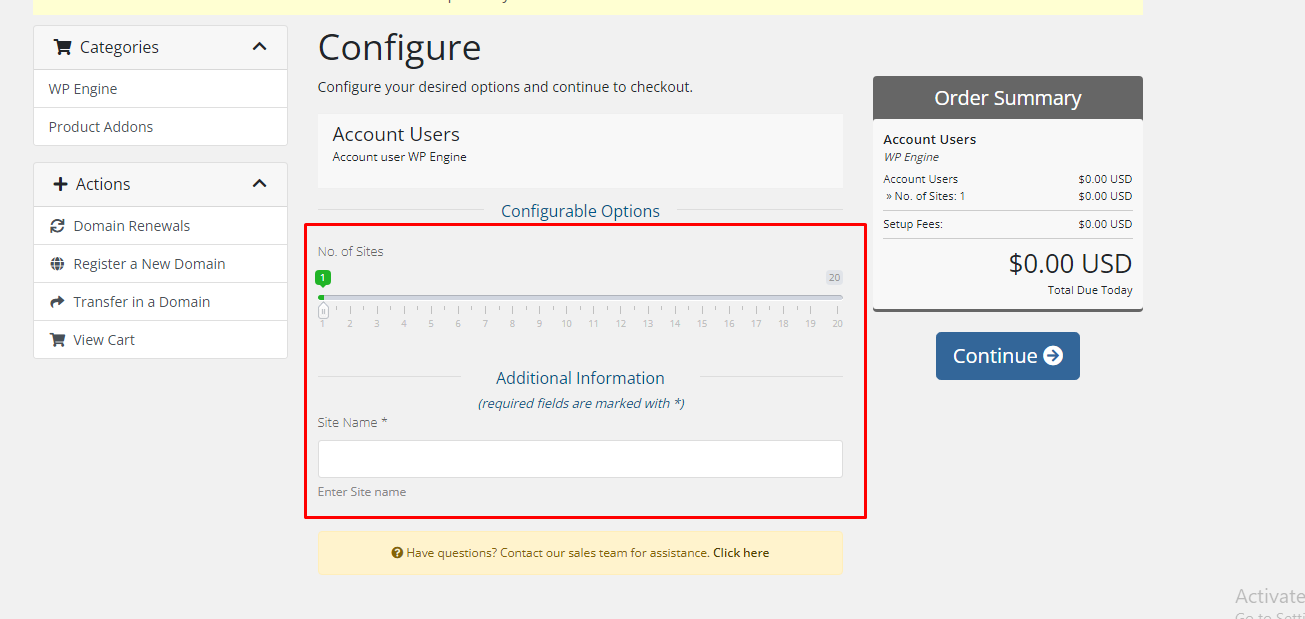
After that click on the continue and enter the billing details to order the service after that the service will be shown in the client area under the my services tab.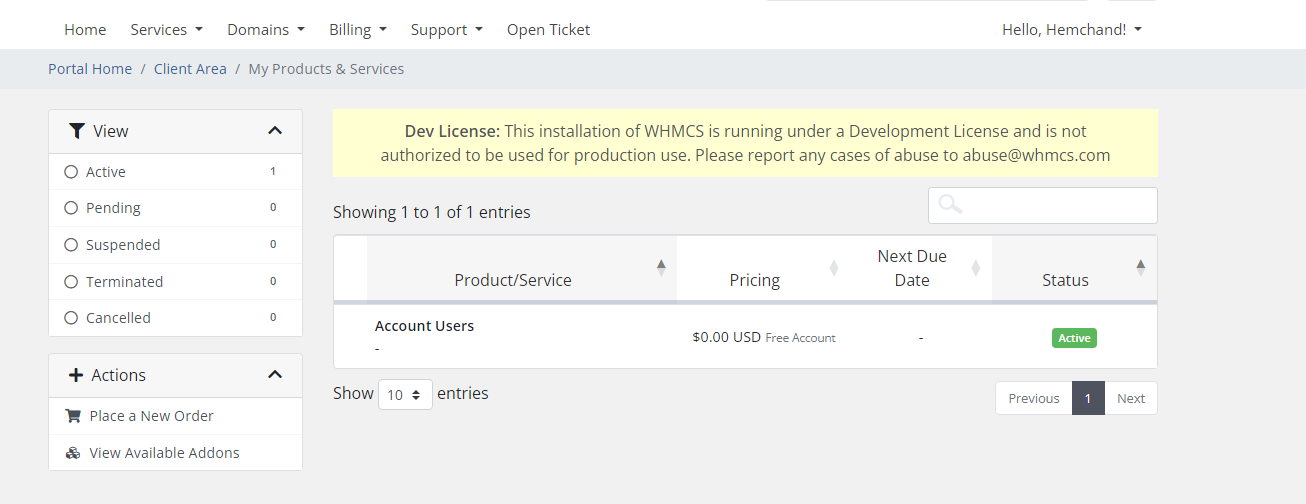
Client area features:
On the client area you can see the list of the side and the environments you created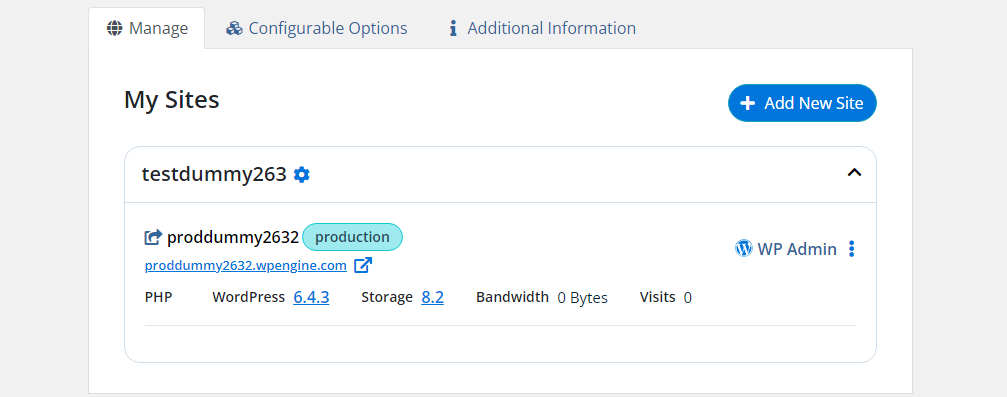
Add new Site: In add new side option you can add new side and environment.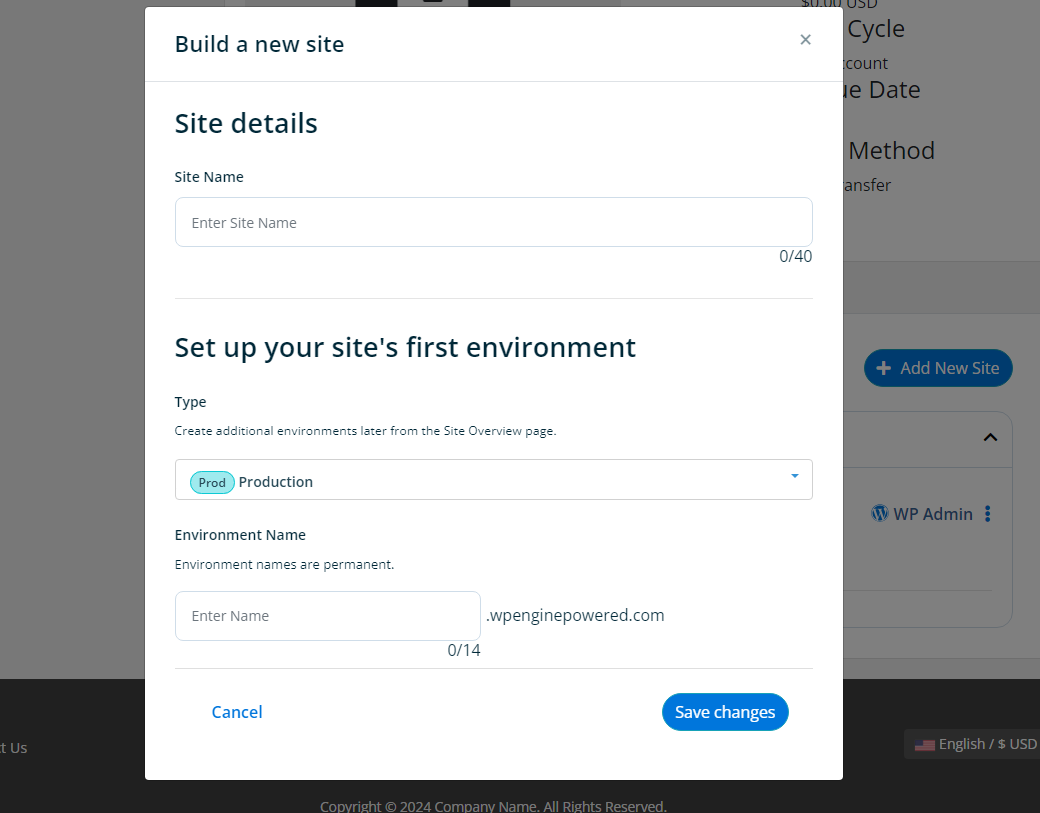
Site Name: Enter Sirte same
Type : You can select the type the environment weather its production , staging or the development
Environment Name: in this we can enter the environment name
After that click on save changes.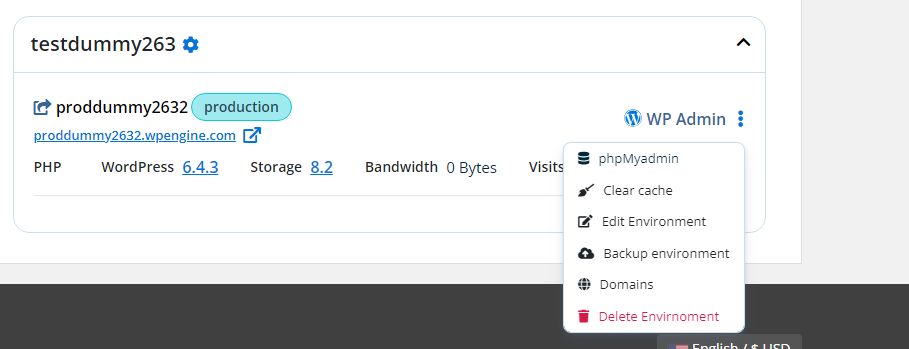
Wp Admin: When the environment is created it wp account is already created with that so you can access the wp admin by clicking on that option
Clear cache: By clicking on clear cache option you can clear the cache of that environment.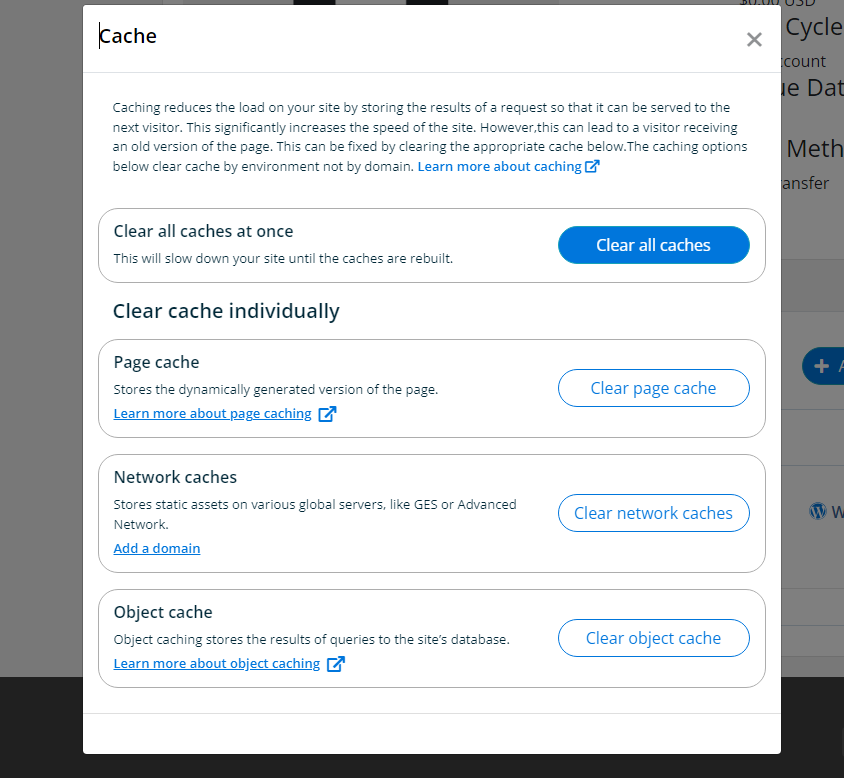
Edit Environment : You can edit the environment name.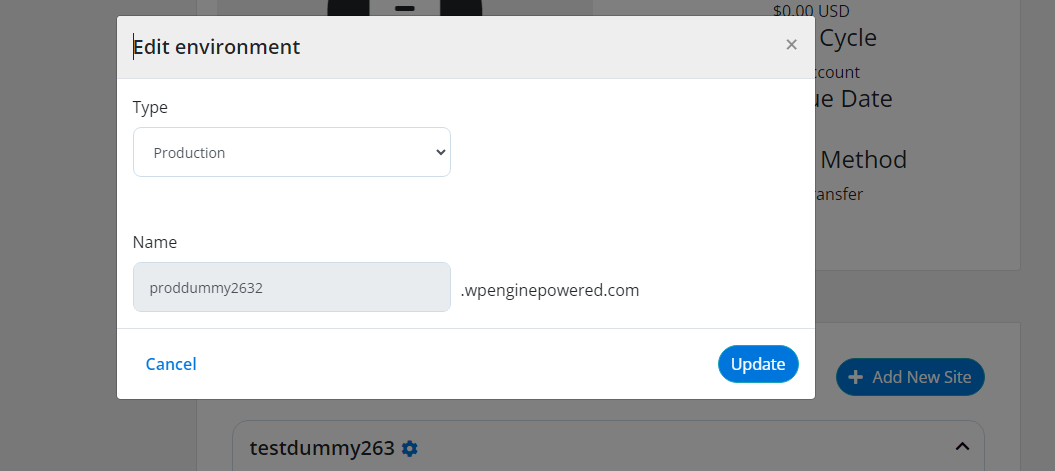
Backup Environment: We can create the backup of the environment by cycling on this option.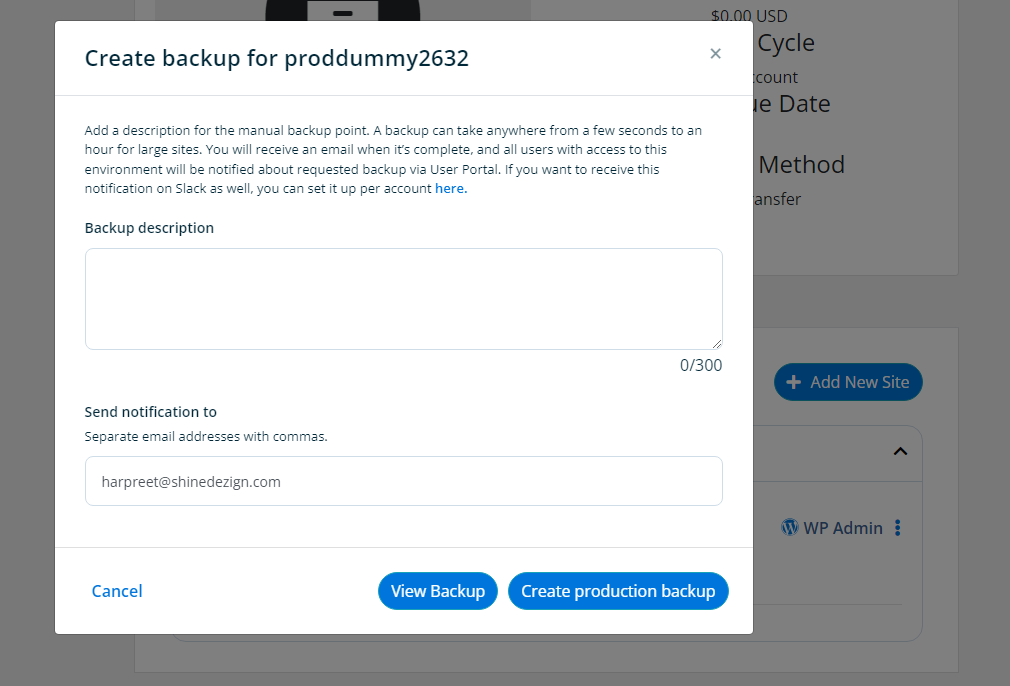
We can add the description of the backup and also enter the email to which you want to send the backup mail
Delete Environment: we can delete the environment by clicking to this options
Domains: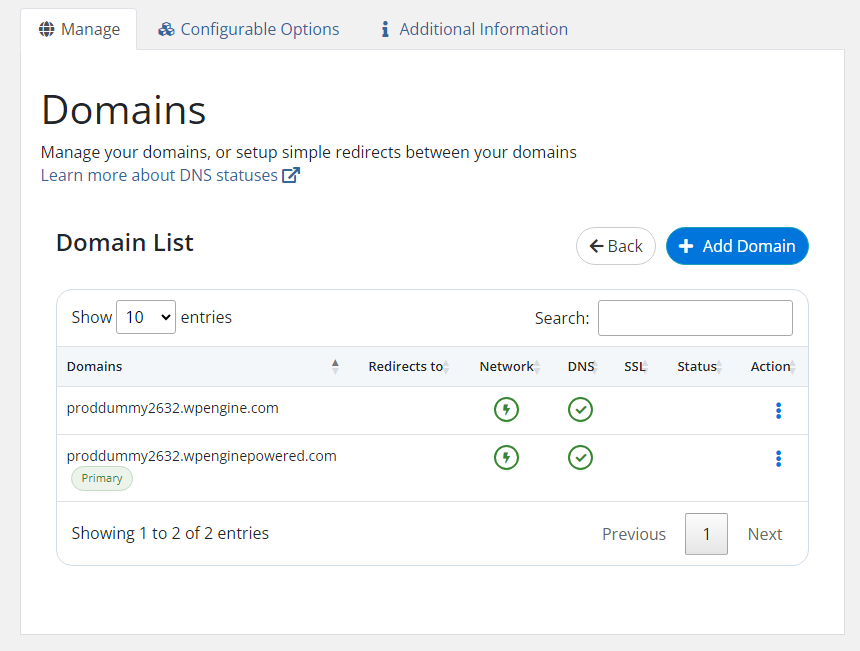
Add Domain: we can add the new domain in add domain option.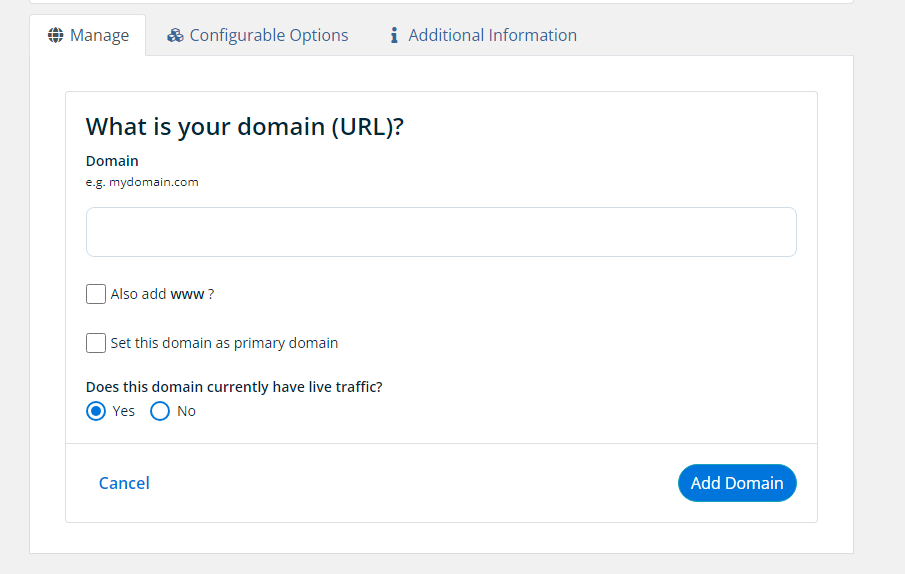
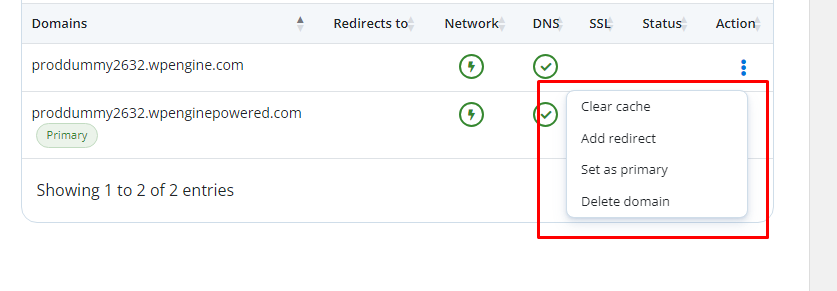
● Clear Cache: To clear the cache of the domain.
● Add Redirect: To redirect the domain.
● Set as Primary: To set the domain as the primary domain.
● Delete Domain: To delete the domain

